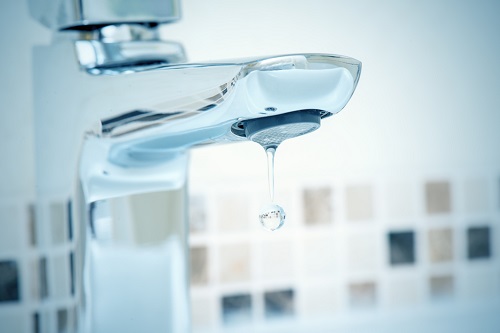
 Drip, drip. Like the tick-tock of a grandfather clock, listening to the rhythmic noise of a leaky faucet can create that nails-on-a-chalkboard feeling in many of us.
You might think that calling a plumber to repair a leaking faucet is an unnecessary expense or that it’s possible to ignore the drip, drip. It’s important to know that leaky faucets not only waste water but can also increase your water bills.
A leaking faucet can be fixed by anyone. This DIY guide will show you how to fix any type of faucet in your home. It also explains why a faucet leaks so you don’t have to call a plumber again. Grab your plumber’s hat and get ready to dive in!
The Four Faucet Types
Knowing the types of faucets that a home has is a great way to learn how to fix a leaking faucet. Knowing which type of faucet your home has will give you more information on how to fix a dripping tap.
Cartridge Faucets
Two handles are common on cartridge faucets. They are often found in bathrooms. The cartridge can be turned to adjust the flow of water.
Over time, faucet cartridges become worn and corroded, and encrusted by mineral deposits. This causes improper operation, including leaking bathtub faucets or inability to turn off the water supply.
Disc Faucets
Because disc faucets are maintenance-free, most don’t fall under the “how to fix leaky faucet” category. The water flow is controlled by two ceramic discs. The upper disc lifts and lowers against the fixed lower disc. Due to their near-perfect flat polish, the two discs create an impenetrable seal. The most common reasons your disc faucet leaks are either the outlet and inlet seals, or residue buildup.
Pro tip: To prevent any replacement seals from being broken, keep the disc faucet’s handle in the “on” position when you repair it.
Ball Faucets
The single lever on ball faucets works by pushing up and down in order to adjust the pressure in a rotating manner. A slotted metal ball controls how much water is allowed to the spout when this is done. These are common in high-use areas such as kitchens.
Compression Washer Faucets
Compression washer faucets, although they are the oldest type, are still very popular, especially in older houses. Two handles are used to open and close compression faucets. The handle can be turned to raise or lower the sealing washer, which closes against the valve seat at the bottom of the stem. When the faucet is turned off, this restricts water flow.
How to fix a leaky faucet
Once you have identified each type of faucet, it is time to fix the dripping faucet. We’ll then walk you through the steps necessary to fix a leaky faucet.
1. Turn off the water supply
Turn off the water supply to your area to repair a leaking faucet. You could flood your area if you don’t do this. Look for the fixtures shut off valves under the sink or around the tub and turn the handles clockwise to shut off the water.
If the faucet does not have shutoff valves on it, you should turn off the main water supply to the house. Turn the faucet on to check that water is not leaking. If there is no water, you have done your job.
2. Remove the faucet handles
Depending on what type of fixture you have, the method for disassembling faucet handles varies. Flathead screwdrivers are used to remove the cap on cartridges or compression-style faucets. You will see the screws holding the handle in place. These can be removed with a screwdriver.
Ceramic discs and ball-style faucets typically have an inlet screw at the handle that exposes the inner workings beneath.
3. Remove the Valve Stem
After removing the faucet handle and compression-style faucets for the cartridge, you’ll be able to see the inner stem or cartridge. These items should be removed. A brass stem can be removed from a compression faucet. Cartridge faucets can be pulled out by pulling on the stem.
Ceramic discs will include an upper disc with mounting screws, and seals, and a ball-style faucet will have inlet and ball seals.
4. Examine Sink Parts
Take all of the parts apart and inspect them. The cartridge and compression-style faucets should have corroded rubber washers and O-rings.
Ceramic disc faucets don’t usually need to be repaired. If you have to fix a leaky faucet that has ceramic discs, make sure you check the outlet and inlet seals on the lower disc. The concern would be with the seats and springs of the ball-style faucets.
5. Repair All Damaged Parts
Replace any worn or damaged parts. You can match exact parts at your local hardware store. Bring the parts you need to fix a leaky faucet to your local hardware store.
6. Clean the Valves & Faucet Cavity
You’ll often find mineral buildup in the threads if you remove a cartridge or stem. You can clean the valve seat with white vinegar by soaking it in warm water for a few minutes. Use a soft toothbrush to scrub the valve seat. Rinse with warm water. You can also clean the faucet cavity using vinegar and water.
7. Reassemble the Faucet
After you have removed the old replacement parts and cleaned the faucet, you can reassemble it in the same way you disassembled it. Slowly turn on the water supply while the faucet knobs are in the “on” position. This is crucial as the excessive water pressure can cause damage to any hardware within the faucet.
These steps will help you prevent air from getting in your water lines if you’re fixing multiple faucets or turning off the water to the whole house.
Consider replacing the faucet if it is damaged beyond repair. When that happens, you need to hire a plumber in Myrtle Beach.
Five Leaky Faucet Problems
There are many reasons why a faucet can leak, including a leaking bathtub faucet. We’ll be covering the five most important causes that you should keep an eye on in the future. One of these is likely to be the reason you need to know how to fix your faucet handle.
Check for broken or improper washers
Broken washers are one of the leading causes of a leaky faucet. Rubber washers are used to protect the valve seat. The washers will wear down if they are used enough. The faucet is now leaking because the seal has worn down.
A washer that is not installed correctly or of the wrong size could cause leaking. You should inspect the faucet handle and the spout/aerator for signs of a washer leak.
Assess for a deteriorated valve seat
A bad valve seat could cause your faucet to leak from the handle but not the spout. The valve seat is basically the barrier between the faucet and the spout. The valve seat is the barrier between the faucet and the spout. Sediment can build up and cause a blockage.
Examine a damaged cartridge
A cartridge-style faucet is a two-handled faucet that has one hot and one cold water designation. Each handle has a cartridge that controls the flowing of water into the faucet. The cartridge may be damaged if your faucet drips water.
How to deal with an O-ring that is defective
An O-ring, a small disc in the shape of a doughnut, is attached to the faucet’s stem to keep the handle in place. O-rings are like washers. They wear down and loosen with use. This could be the cause of a leaky faucet handle.
High Water Pressure
High water pressure is something that many people enjoy, but it can also lead to a leaking faucet. High pressure can cause water pipes to clog. The water will stop flowing smoothly to its destination and create a backup. The water will inevitably leak out of the taps as it is forced to find another route.
Water pressure can be affected by cracked pipes, fittings, or other plumbing. It is a good idea to inspect all water pipes and fittings periodically for cracks, corrosion spots, and leaks. You can fix water pressure issues yourself, but it is best to call a plumbing contractor.
Call Blue Ribbon Plumbing LLC now if you’re having problems with your plumbing system. Our plumbers will fix your leaky faucet right away.
Like our Facebook page for more great info about plumbing services.
Blue Ribbon Plumbing LLC
4201 Carolina Exchange Drive Suite 202
Myrtle Beach, SC 29579
(843) 267-9733
Serving all of Horry County including Myrtle Beach, North Myrtle Beach, Little River, Murrells Inlet/Garden City, Surfside Beach, Carolina Forest/Forestbrook, Conway/Aynor


 Homeowners can have a lot of trouble with their
 The
The 
 If you are familiar with the basics of plumbing, many problems can be avoided. These are 11 essential
 Are you unsure if your water heater needs to be repaired? These are five signs that you may need to contact a professional to fix your
 Do you want to know how to check the


 Owning a home requires many tasks. Although it is hard work, the rewards are worth it when your investment begins to grow. You have many reasons to be a proud homeowner. However, you can only experience them if your home maintenance is on the right track. Knowing when it is time to call a
 It can be difficult to decide whether to buy a water heater for your home if your existing unit is working. However, in certain cases, water heater replacement may be the best option. This will allow you to save money in ways that you didn’t know. There have been many instances when homeowners have discovered that
 Blue Ribbon Plumbing LLC is a trusted family-friendly